Your First Widget
Setting up a widget file is easy, but there are few gotchas that can perplex beginners. This tutorial assumes some basic familiarity with the command line. Before starting, you should make sure you have downloaded the Python Scripts and created your configuration file.
The first step is to create a new widget in the Widget Admin console. Click on the New Widget button and enter a name for your widget. Widget names should be short and snake-case (lowercase, with underscores). This will create the resources for your widget on the server. In this example, I will create a widget called "money_stuff".
Now create a folder for your new widget in the code directory on your local machine.
This is the directory that you entered in your configuration file,
in this case it is /Users/dburfoot/Desktop/widgetcode
        # Go to my widget code directory, create a new folder
        $ cd /Users/dburfoot/Desktop/widgetcode
        $ mkdir money_stuff
Just for the sake of example, I will upload a file called "hello_world.txt" to the server. This won't do anything special, but it confirms that everything is setup correctly.
        $ cd money_stuff/
        $ echo "Hello, world" >> hello_world.txt
        $ ls
hello_world.txt $ CodeUploader.py widgetname=money_stuff
Created new file /opt/userdata/widgetserve/dburfoot/money_stuff/hello_world.txt
Uploaded 1 files, 0 previous, 0 unchanged
The file is now being hosted on the WWIO server.
To confirm it is available, you can create the URL for it and paste it into your browser's URL box.
The URL will be https://webwidgets.io/u/YOUR_USER_NAME/money_stuff/hello_world.txt.
My username is dburfoot.
Now we will add some data to the SQLite DB. You can create the DB on your own, but the WWIO server has already created one for you with the right name, so let's use that one. Pull the DB to your local machine using the PullData.py script:
        $ PullData.py widgetname=money_stuff
        % Total    % Received % Xferd  Average Speed   Time    Time     Time  Current
                                 Dload  Upload   Total   Spent    Left  Speed
        100  8192    0  8192    0     0  27961      0 --:--:-- --:--:-- --:--:-- 28054
        Success, downloaded DB file to path /Users/dburfoot/Desktop/widgetdata/MONEY_STUFF_DB.sqlite
The script has downloaded the DB file to the widget data directory you set in the configuration file,
in my case it is
/Users/dburfoot/Desktop/widgetdata.
Now you can update that DB file to contain the data you want to use for your app.
Open the DB file in the sqlite3 program.
After that, create a simple table with 3 fields, including an id primary key.
Important:
all valid Widget DB tables must have a single integer primary key named id.
        $ cd /Users/dburfoot/Desktop/widgetdata
        $ sqlite3 MONEY_STUFF_DB.sqlite
        SQLite version 3.28.0 2019-04-15 14:49:49
        Enter ".help" for usage hints.
        sqlite> create table big_money (id int, amount int, desc varchar(20), primary key(id));
        sqlite> .schema
        CREATE TABLE big_money (id int, amount int, desc varchar(20), primary key(id));
Now I upload the file with the DataPush.py script. The server tells you a bit about how it is handling the upload, in particular, it tells you how it has auto-generated a JS file from the SQLite definition.
        $ DataPush.py widgetname=money_stuff
        Saving DB file for widget dburfoot::money_stuff
        Deleted old DB file /opt/userdata/db4widget/dburfoot/MONEY_STUFF_DB.sqlite
        Copied upload file to location /opt/userdata/db4widget/dburfoot/MONEY_STUFF2_DB.sqlite, size is 12288
        Wrote autogen code to path /opt/userdata/widgetserve/dburfoot/autogenjs/money_stuff/BigMoney__001.js
This interaction shows you a few highlights of what is happening on the server when you upload the file.
The server has analyzed the schema of the DB table,
and generated a JavaScript file that will enable you to interact with the DB, from the browser.
If you're interested, you can look at the JS autogen file by composing the URL and pasting it into your browser.
For this widget, the URL will be
https://webwidgets.io/u/YOUR_USER_NAME/autogenjs/money_stuff/BigMoney__001.js
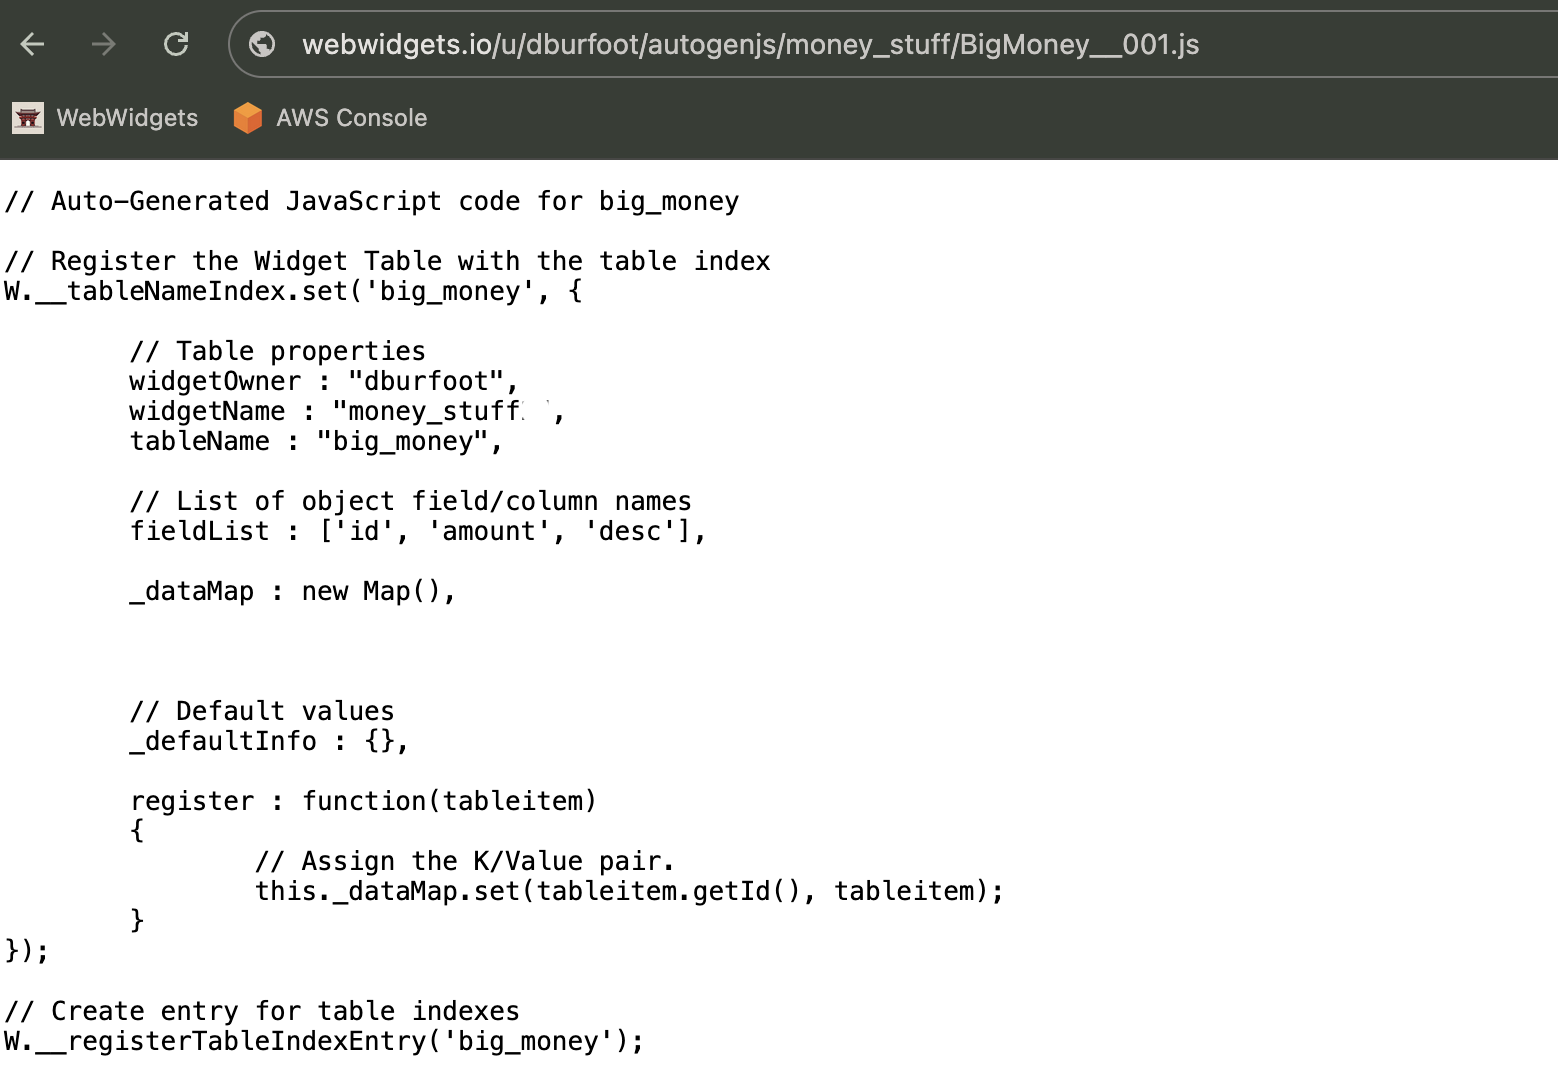
Don't worry: you don't actually need to understand all of that code! It is just backend plumbing for the system.
Now I'm going to create a bare-bones widget.wisp file.
You can use this page as a skeleton for developing your widgets.
(New: you can now generate skeleton .wisp files
directly from the source DBs using the Template Generator feature.)
<html>
<head>
<title>Money Stuff</title>

<wisp/>

<script>
function redisplay()
{
    const itemlist = W.getItemList("big_money");
    populateSpanData({"num_records" : itemlist.length });
}
</script>

</head>

<body onLoad="javascript:redisplay()">

<center>

<h3>Money Stuff</h3>

Number of records: <span id="num_records"></span>

</center>
</body>
</html>
As you can see, there's only one difference between this file and a normal, pure HTML/JS file
(ie, a file you could look at with your browser's Open File command).
The difference is the <wisp /> tag
that comes right after the <title> tag.
This tag instructs the WebWidgets framework to pull in the data and code
associated with the DB file we just uploaded
(it figures out to use the money_stuff DB from the URL. You can pull
other Widget DB data in by using different arguments, see WispFileFormat docs).
It also checks to ensure the user is logged in,
and if not, will bounce the user to the login page.
If all goes well, you should see a page that looks like this:

It's showing 0 records because we don't have any data in the SQLite DB. Let's go back to the DB and enter some data:
        $ sqlite3 MONEY_STUFF_DB.sqlite
        SQLite version 3.28.0 2019-04-15 14:49:49
        Enter ".help" for usage hints.
        sqlite> .schema
        CREATE TABLE big_money (id int, amount int, desc varchar(20), primary key(id));
        sqlite> insert into big_money values (5, 15, 'cheeseburger');
And use the uploader script to send the data to the server:
        $ DataPush.py widgetname=money_stuff
        Saving DB file for widget dburfoot::money_stuff
        Deleted old DB file /opt/userdata/db4widget/dburfoot/MONEY_STUFF_DB.sqlite
        Copied upload file to location /opt/userdata/db4widget/dburfoot/MONEY_STUFF_DB.sqlite, size is 12288
        New version of AutoGen code identical to previous for DB big_money
Now we reload the page in the browser and we see our new record:

You can also see the record content by going into the browser JavaScript console and calling
W.getItemList(tablename):

Okay! Your widget is setup correctly. From here, you can add more tables to the SQLite database, or start to build out the user interface for your widget. For more ways to manipulate the data, check out the JavaScript API.